How to Fix Gmail Outgoing Emails Marked as Queued
Every app malfunctions at one point of time or another and Gmail is no exception. Despite being very efficient and trustworthy, there are rare occasions when Gmail does not work properly. It could be because of a bug or some other internal problem with your Android smartphone. Anyway, when Gmail fails to perform its very purpose, i.e. to send emails, then it is a serious problem and needs to be resolved at the earliest. While sometimes the problem is with Google’s servers itself and there is nothing that you can do apart from waiting, other times there is a simple fix to solve the problem. In this article, we are going to provide you with some simple solutions that you can try to fix the problem of Gmail not sending emails on Android.
How to Fix Gmail Outgoing Emails Marked as Queued 1. Double Check Recipient’s Email Address 2. Try Opening Gmail in a Browser 3. Clear Cache and Data for Gmail 4. Update the App 5. Uninstall Gmail and then Re-install 6. Delete Your Google Account and then Add it Again
1. Double Check Recipient’s Email Address
Sometimes the reason behind an email not getting sent is a simple human error. It is quite normal to make a mistake while entering the email address of a person and as a result, the email doesn’t get delivered. The email address needs to be perfect, and even a misplaced or altered letter could cause your email to get stuck in the Outbox forever. Therefore, it is always advisable to carefully check the recipient’s email address before concluding that there is an error in the app or Gmail itself. Read our guide to Fix Email Address Not Found in Gmail. If everything is correct and you are still facing the same problem, then move on to the next solution.
2. Try Opening Gmail in a Browser
In order to make sure that the problem is with the app and not Gmail itself, you need to open the app in a web browser, like Chrome or Firefox. Follow the steps given below to see how:
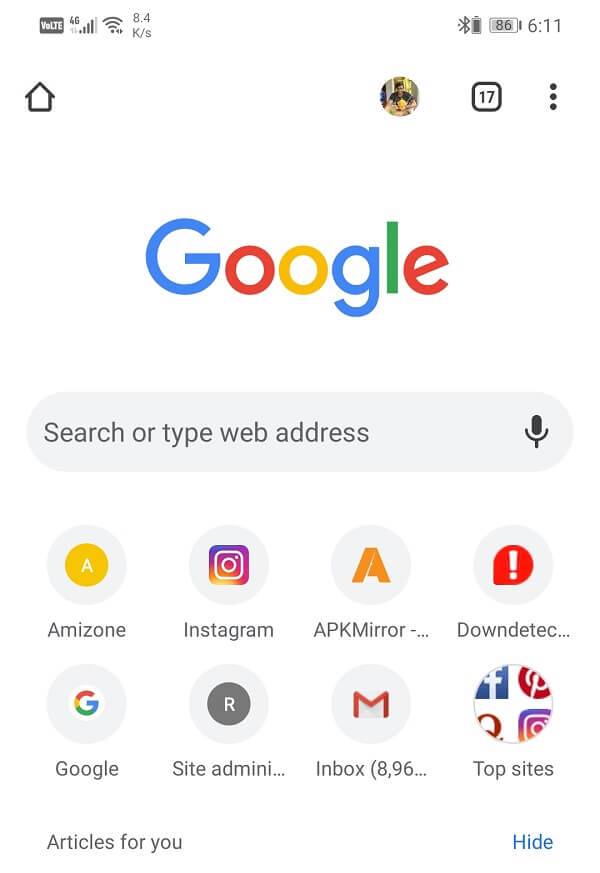
Firstly, open Google Chrome (you can use any other browser if you want).
Now tap on the Home icon on the top left-hand side of the screen.
Here, click on the Apps icon.
Select Gmail from the expanded menu.
If you are already logged in to Chrome using your Google account, then it will directly open Gmail’s Inbox. Otherwise, you will have to sign in with your username and password.
After this, tap on the Refresh button on the top left-hand side of the screen.
If you see that emails are being received normally, then the problem is with the app, or else the problem is with Gmail itself. Also Read: Fix Gmail Notifications Not Working On Android
3. Clear Cache and Data for Gmail
Sometimes residual cache files get corrupted and cause the app to malfunction. When you are experiencing the problem of Gmail not sending emails on Android, you can always try clearing the cache and data for the app. Follow these steps to clear the cache and data files for Gmail.
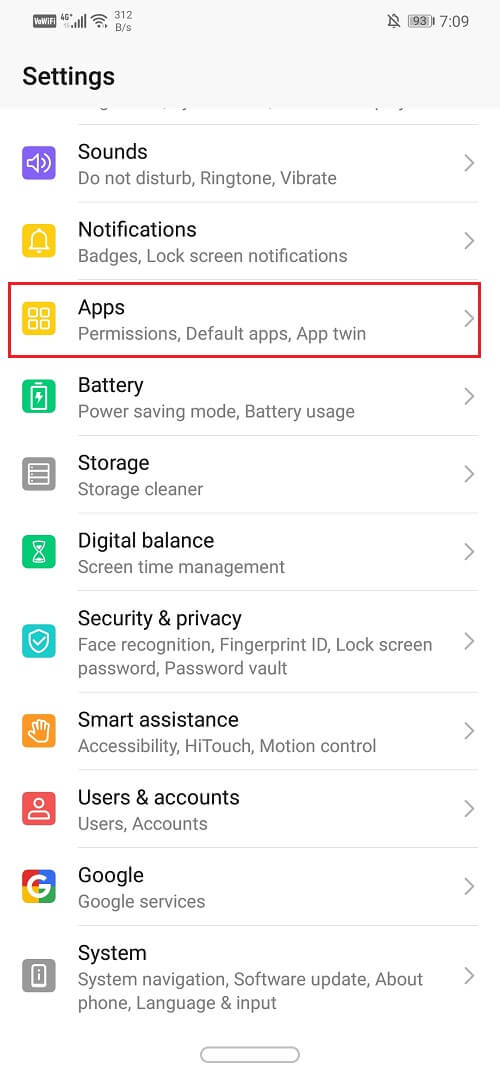
Go to the Settings of your phone.
Tap on the Apps option.
Now select the Gmail app from the list of apps.
Now click on the Storage option.
You will now see the options to clear data and clear cache. Tap on the respective buttons and the said files will be deleted.
Also Read: Fix Mozilla Firefox Couldn’t Load XPCOM Error on Windows 10
4. Update the App
The next thing that you can do is update your Gmail app. A simple app update often solves the problem as the update might come with bug fixes to resolve the issue.
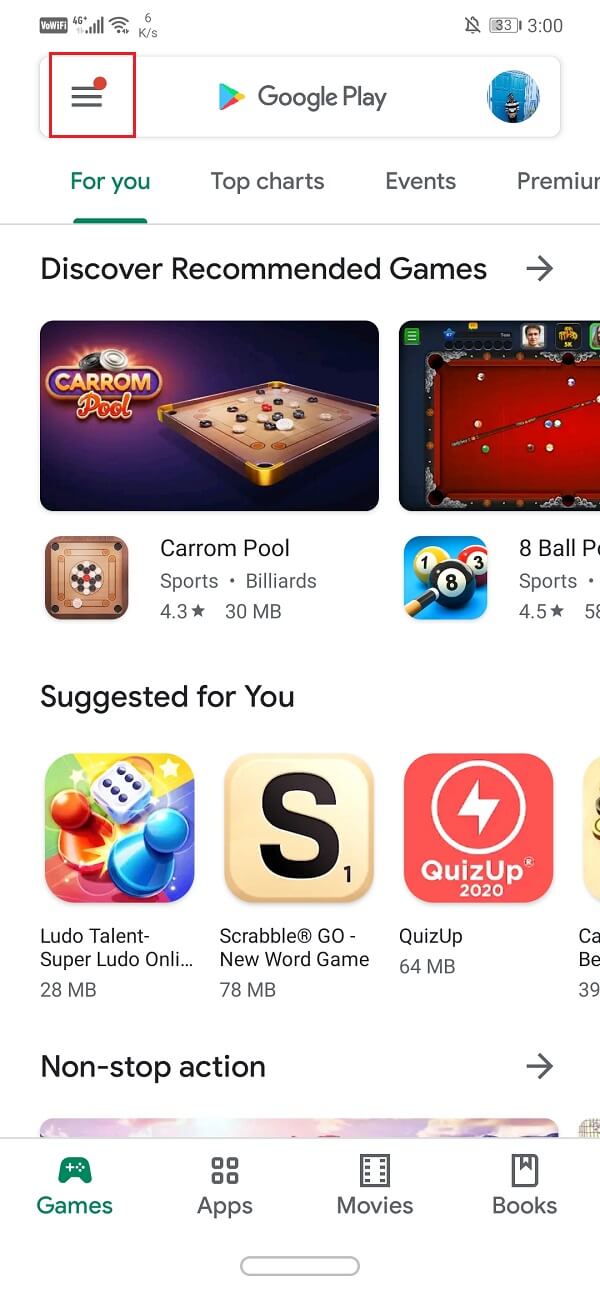
Go to Playstore.
On the top left-hand side, you will find three horizontal lines. Click on them.
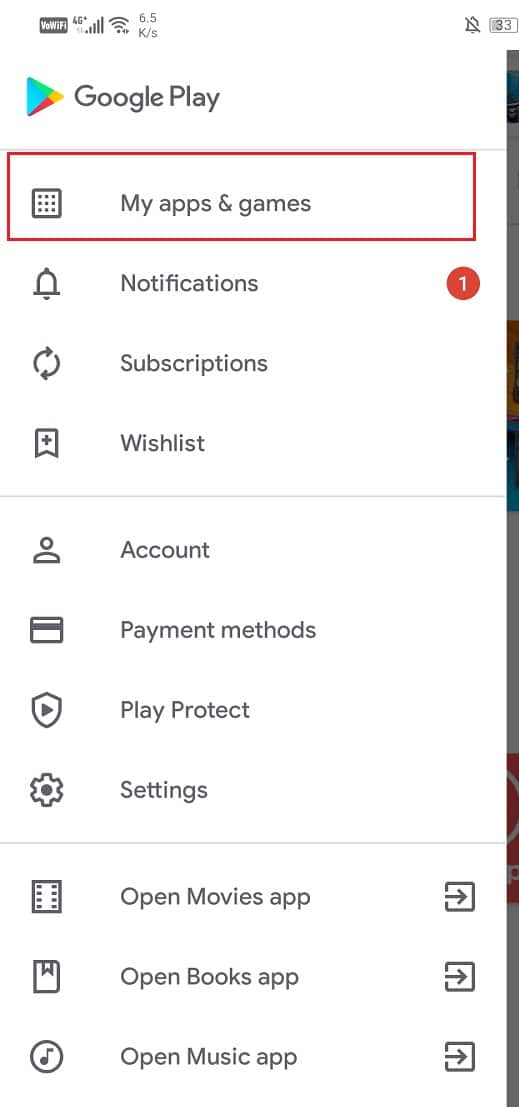
Now click on the “My Apps and Games” option.
Search for the Gmail app and check if there are any pending updates.
If yes, then click on the update button.
Once the app gets updated, check if you’re able to fix Gmail not sending emails on the Android phone.
5. Uninstall Gmail and then Re-install
If the above method does not work or there is no update available, then you can always aim for a fresh start. Had it been any other app, it would have been possible to uninstall the app completely. However, Gmail is a system app and can’t be uninstalled. Instead, it would help if you uninstalled updates for the app. Doing so will leave behind an old version of the app, the one that was installed at the time of manufacturing. Follow the steps given below to see how:
Open the Settings on your phone.
Now, select the Apps option.
Now, select Gmail from the list of apps. On the top right-hand side of the screen, you can see three vertical dots, click on it.
Finally, tap on the uninstall updates button.
Now, you may need to restart your device after this.
When the device starts again, try using Gmail again.
You might be prompted to update the app to its latest version. Do it, and that should solve the problem.
Even if you do not receive any pending update notification, go ahead and update the app from Play Store anyway.
6. Delete Your Google Account and then Add it Again
The next method in the list of solutions is that you sign out of the Gmail account on your phone and then sign in again. It is possible that by doing so it would set things in order and Gmail will start working normally.
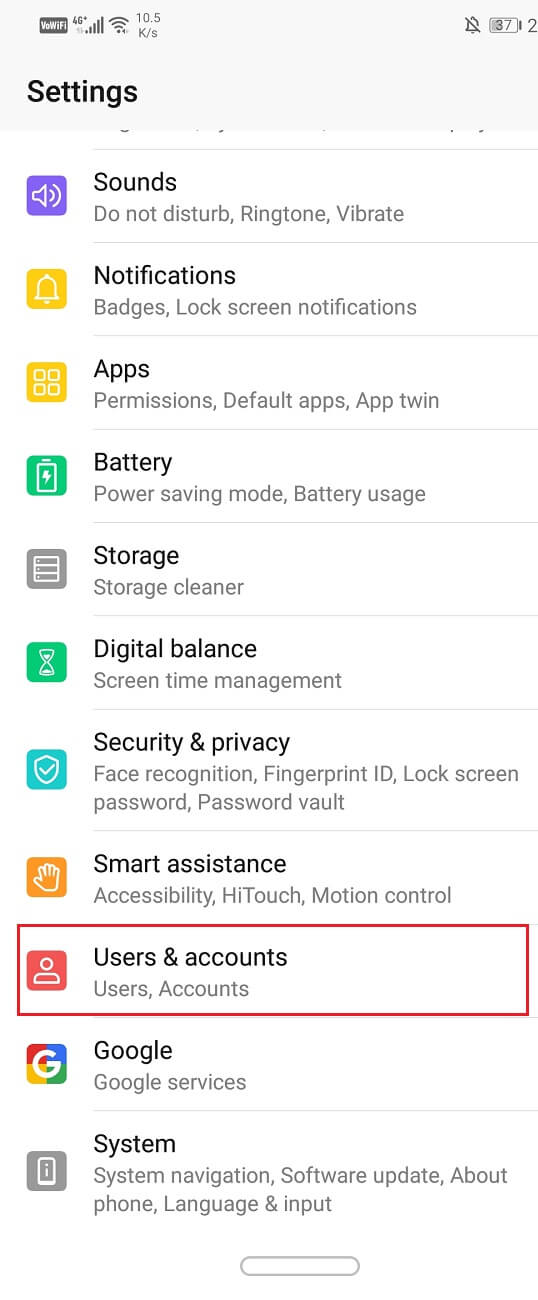
Open the settings on your phone.
Now click on the Users & accounts.
Now select the Google option.
At the bottom of the screen, you will find the option to Remove account, click on it.
This will sign you out of your Gmail account. Now Sign in once again after this and see if the problem has been resolved or not. Recommended:
Recall an Email You Didn’t Mean to Send in Gmail How to Use Gmail Offline in Your Browser How to use Android phone as a PC gamepad
We hope that this information was helpful and you were able to fix Gmail not sending emails on Android. If the problem still persists, then it is possible that Google servers are down. The only thing that you can do in this case is to wait for them to resolve the issue. Meanwhile, you can send a complaint to Google Support so as to notify them about a probable bug in the current version of the app.


![]()


